-
MenuBack
-
TILES
-
-
-
-
-
-
-
OTHER CATEGORIES
-
-
-
-
OTHER MATERIAL
-
-
Installation and maintenance
-
- Recommendations
- PROFESSIONALS
- Contact
-
SOCIAL MEDIA
-
-
MenuBack
-
TILES
-
-
-
-
-
-
-
OTHER CATEGORIES
-
-
-
-
OTHER MATERIAL
-
-
Installation and maintenance
-
- Recommendations
- PROFESSIONALS
- Contact
-
SOCIAL MEDIA
-
Cutting ceramic tiles correctly is key to achieving a clean, professional result in any renovation or tiling project. Whether you're a DIY enthusiast or a renovation expert, knowing how to cut tiles accurately can make a big difference in the final look. Below, we explain different techniques—both with and without specialized tools—to help you get clean, error-free cuts.
How to Cut Tiles Correctly
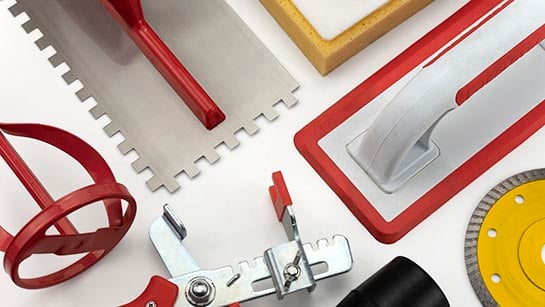
The most common and accurate way to cut tiles is by using a manual tile cutter or an angle grinder. These tools allow you to make straight, angled, or even curved cuts depending on your project's needs.
For a perfect cut:
- Measure and mark the cutting area precisely using a pencil or permanent marker.
- Use a metal ruler as a guide to ensure straight cuts.
- If you're using a manual tile cutter, press down steadily to score the surface before snapping the tile.
How to Cut Tiles with a Manual Tile Cutter
If you don’t have electric tools, a manual tile cutter is a practical and affordable option. It's ideal for straight and precise cuts in small DIY or home improvement projects.
Steps for cutting with a manual tile cutter:
- Mark the cutting line on the glazed surface of the tile with a pencil or marker.
- Place the tile into the manual cutter, aligning the mark with the guide.
- Slide the cutting wheel with light pressure to score the surface.
- Use the lever to snap the tile along the scored line.
- If needed, file or sand the edges to smooth out imperfections.
This method is clean, quiet, and doesn’t require electricity—making it ideal for simple jobs or when dust control is important.

How to Cut Tiles with an Angle Grinder
One of the most versatile techniques is cutting tiles with an angle grinder. This tool is particularly useful for curved cuts, L-shapes, or tricky areas like corners and edges near outlets.
Tips for use:
- Use a diamond blade suitable for ceramic tiles.
- Work on a stable, well-secured surface.
- Wear gloves and safety goggles to prevent accidents.
- Make the cut slowly to avoid damaging the tile’s glaze.

How to Cut Tiles Without a Tile Cutter
If you don’t have access to a tile cutter, you can use a ceramic hand saw or a small angle grinder. For simple straight cuts, even basic tools like a glass cutter and a metal ruler can be effective.
This method is great for one-off adjustments or when improvising during an installation.
- Mark the cutting line with a pencil on the tile's glaze.
- Score the line using a cutter or glass scorer.
- Place the tile on a firm surface with the score aligned to the edge and snap it by applying pressure.
- Use a file to smooth the edges if needed.

Tips for a Perfect Finish
- Use an angle grinder with a diamond blade. First trace a guide line, then make a shallow initial pass before cutting fully through the tile with firm, back-and-forth movements.
- If you're new to using these tools, practice on spare tiles before cutting the final pieces.
- Always use the right safety gear: safety goggles, sturdy gloves, and—if possible—ear and dust protection.
- For glazed tiles, always mark on the glazed side. If a pencil line is hard to see, use a marker and clean it off with alcohol afterward.
- Wet saws and professional tile cutters can be bulky and expensive. If you only need a few cuts, consider renting tools from a hardware or DIY store.
Thanks to these techniques, you now know how to cut tiles without a cutter or using professional equipment, ensuring clean results for your renovation projects.
Looking for high-quality tiles for your next renovation? At Ceramic Connection, you'll find a wide range of models and formats to bring your design ideas to life with precision and style.
Related Articles:
- Step-by-step guide to installing ceramic tiles with a professional finish
- Advantages of using ceramic tiles in your home
- Technical guide to calculating tile area for walls and floors
Related posts
-
 24/02/2023FRESH STYLE IN INTERIORS: VITALITY AND LIGHTNESS24/02/2023> Read more
 -
 12/05/2023SMALL TILE LAYOUT PATTERNS TRENDS FOR 2023> Read morePosted in: Installation12/05/2023
 -
 15/05/2023THE IMPORTANCE OF GROUT IN TILE INSTALLATION> Read morePosted in: Installation15/05/2023
 -
 24/05/2023WHY ORDER 15% MORE CERAMIC MATERIAL?24/05/2023> Read more


