


HOW TO TILE A BATHROOM CORRECTLY AND EASILY?
Tiling a bathroom can be one of those jobs that we all have to do at some point in our lives but, in reality, few people know the techniques to do it in a simple way. Changing bathroom tiles can be a fun and easy job if we know how to carry it out, so today we want to take this opportunity to tell you 7 tips and tricks for all types of bathroom renovations.
1. Plan and design the project
The first step is to plan and design the work we are going to carry out in our bathroom. For this, it is very useful to take the measurements of the bathroom and plan which walls we want to cover with tiles. This way, by taking measurements and having a previous planning, you will be able to simplify the work a lot and achieve better results.
2. Prepare the surface
Once you have taken the measurements of the bathroom and the walls you want to tile, the next thing to do is to prepare the surface to change the bathroom tiles. If you have a clean, untiled wall, you can go straight to filing it to make it as smooth as possible so that it will be easier to tile afterwards.
If, on the other hand, your wall is lined with tiles and you want to replace them, you will have to chop up the entire wall, removing any remains of the old tiles, and then apply a base coat to smooth the entire wall.
Likewise, before you start tiling with the new tiles, you must leave the entire wall clean and completely dry.
3. Choosing the right tiles
At Ceramic Connection you can find all kinds of tiles from small format tiles with a more marked and dynamic aesthetic, to large format tiles that evoke more elegant, simple and subtle spaces. A wide variety of products in which, by dedicating a little time, it will not be difficult to find tiles that fit in with what you are looking for.
4. How to lay the tiles
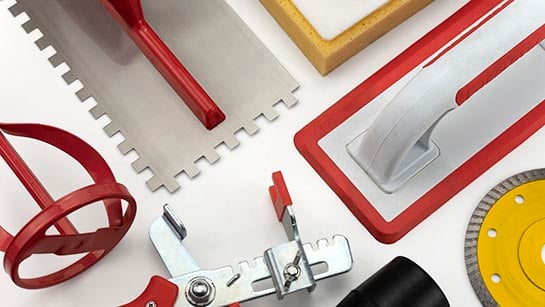
Once you've chosen your perfect tiles and prepared the wall for installation, it's time to get your hands dirty. To lay the tiles you will need to have some specialized tools (here are a few recommendations!), which will allow you to spread the mortar well and fix the tiling correctly to the wall.
In this sense, it is best to always start from the bottom upwards, never from the centre of the wall, and calculate, before starting to lay the tiles, how many you will have to install per wall. In this way, you will not leave uneven tile lines and you will be able to know in advance how many tiles you will have to cut to finish tiling the wall.
5. Applying the mortar
Mortar is one of the most important parts of any tiling process. Preparing it correctly and applying it properly are two of the most important steps to bear in mind.
On the one hand, you must make a consistent mixture, as indicated by the manufacturer.
Then you have to spread the mortar on the surface of the wall with help of a notched trowel.
From here, you will have to apply the mortar evenly on the back of each tile, leaving a thickness of one centimeter over the entire surface.
Once applied, place the tile directly on the wall and anchor it with special crosspieces to mark the separation between the tiles.
6. Cover with grout and silicone
Another of the most important steps for good tiling is grouting.
You should cover the joints and corners of the walls with the chosen grout, spreading it well over the entire surface and making sure that it covers all the joints.
It is also a good idea to apply special bathroom silicone in expansion areas or in the corners of the bathroom.
7. Work the finish on the tiles
When the grout is dry, rub gently with circular movements using a sponge or even a mop, water and soap to remove the cement from the tiles. Finish by wiping with a damp cloth and cleaning any small joints or traces of cement that may remain.
Related posts
-
 12/05/2023DIFFERENT LAYING PATTERNS FOR SMALL TILES > Read more
 -
15/05/2023Give color to the joints > Read more
-
24/05/2023WHY ORDER 15% MORE CERAMIC MATERIAL? > Read more
-
15/09/2023HOW TO CHOOSE THE RIGHT ANTI-SLIP LEVEL > Read more