-
MenuBack
-
TILES
-
-
-
-
-
-
-
OTHER CATEGORIES
-
-
-
-
OTHER MATERIAL
-
-
Installation and maintenance
-
- Recommendations
- PROFESSIONALS
- Contact
-
SOCIAL MEDIA
-
-
MenuBack
-
TILES
-
-
-
-
-
-
-
OTHER CATEGORIES
-
-
-
-
OTHER MATERIAL
-
-
Installation and maintenance
-
- Recommendations
- PROFESSIONALS
- Contact
-
SOCIAL MEDIA
-
When we have chosen and purchased the ceramic tiles for the room we are renovating, we should consider the orientation of the tiles, as the horizontal and vertical arrangement can make a big difference.
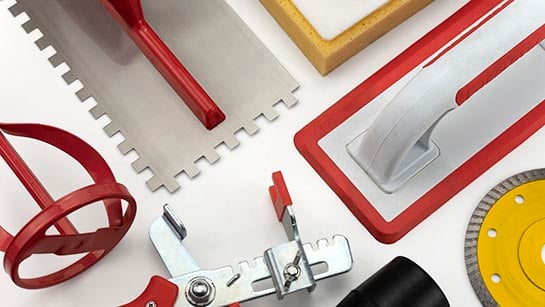
The materials and tools needed are as follows:
- Ceramic tiles
- Tile adhesive mortar
- Tile spacers
- Notched trowel
- Level
- Tile cutting saw
- Rubber float
- Grout trowel
- Tile grout
- Sponge
- Mortar and grout mixing bucket
- Rag
Before you begin, keep in mind that installing ceramic tiles is a painstaking process that requires patience and precision. Here is a step-by-step guide to installing ceramic tiles on walls and floors, both indoors and outdoors.
STEP 1: PREPARATION
Calculate the amount of tiles you need and purchase a surplus for possible cuts and replacements. If you have any leftover tiles, you can consult our article on ideas for using leftovers.
Make sure the surface where you will install the tiles is clean, dry and level.
STEP 2: MORTAR MIXING
Mix the mortar with water in a bucket to a uniform, sticky consistency.
STEP 3: MORTAR APPLICATION
Use a notched trowel to apply the mortar to small sections of the surface, starting at the corners and working towards the opposite side. Then press the notched trowel into the mortar and comb the mortar into even grooves.
STEP 4: LAYING THE TILES
Place the first tile in the corner of the surface, pressing it firmly into the mortar. Use spacers to maintain an even distance between tiles.
Continue laying the tiles, following the design of your choice. Gently press and move each tile from side to side to ensure good contact with the mortar.
STEP 5: TILE CUTTING
If necessary, cut the tiles to fit around edges or obstacles such as pipes. Use a saw to make the cuts and be sure to measure accurately before cutting.
STEP 6: STANDBY TIME AND SETTINGS
Allow the tiles to bond to the mortar for the time specified in the instructions.
Once firmly bonded, remove the spacers and make adjustments if necessary to ensure that they are level and aligned.
STEP 7: GROUTING
Prepare the grout according to the instructions. It should have a consistency similar to peanut butter.
Use a grout trowel to fill in the spaces between the tiles, making sure they are completely filled.
After 15-20 minutes, when the grout is slightly firm to the touch, use a damp sponge to wipe excess grout from the surface of the tiles. Use circular motions and avoid removing grout from the spaces between the tiles.
STEP 8: SEALING (IF NECESSARY)
The need for sealing will depend on the grout, consult the instructions to see if additional sealing is required after complete drying.
STEP 9: TERMINATION
Follow the recommended drying times before exposing tiles to moisture or traffic.
STEP 10: ENJOY!
Congratulations and thank you for trusting us! Now, you will be able to enjoy your tiles, which undoubtedly look spectacular.
Related posts
-
 12/05/2023SMALL TILE LAYOUT PATTERNS TRENDS FOR 2023> Read morePosted in: Installation12/05/2023
 -
 15/05/2023THE IMPORTANCE OF GROUT IN TILE INSTALLATION> Read morePosted in: Installation15/05/2023
 -
 24/05/2023WHY ORDER 15% MORE CERAMIC MATERIAL?24/05/2023> Read more
 -
 24/05/2023HOW TO TILE A BATHROOM EASILY AND PROPERLY> Read morePosted in: Installation24/05/2023


